Saturday, April 28, 2012

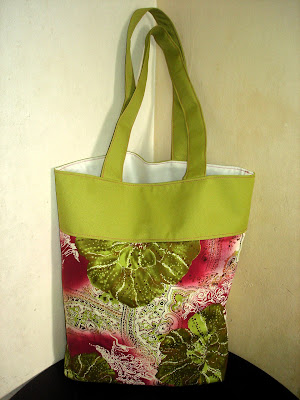
Green Batik Tote!

Greetings! :) So I think these will be my sort of last products for sale before I continue my studies. Anyway, do say hi to my bags and if you interested to buy it, please do comment or email me at super-shiza@hotmail.com, Thankyou! :)


I'm going into batik theme this time!


For this one, it's not turquoise it's greener than it looks. Comes with one pocket inside. The strap are filled with batting so you should feel comfortable when wearing it!

Product code: A1
Size is, 16.5" x 12.5" x 10"
Suitable for casual.
Price : RM32 


Next one, the color is exactly like in the pictures. Straps are filled with batting which feels so comfortable! :) Comes with one pocket, lining is cream color.

Product Code; A2
Size is, 14.5" x 15" x 11"
Suitable for college or casual wear.
Price : RM39


Saturday, April 14, 2012

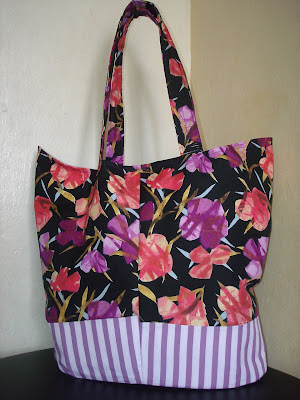
Floral Curve Tote

AVAILABLEEE!


Hello! :) This this time round, it's purple tote! Floral pink purple fabric matched with purple stripe fabric. The lining is purple polka dot fabric which suited the lovely look of the bag! Lovely bag for lovely people :>

The straps are quite stable and dependable, filled with batting (that spongy spongy thingy) so you won't feel that tired when carry this bag :) 

Size : 12"x12"x16.5"
Have three pockets inside and another one outside.
Price : RM39


Want one? Comment me! :) Thankyou!

Saturday, March 31, 2012

Flowery Tote Bag

SOLD :)


Front and side view

So it's the last day of March! I made another Red Paisley Tote Bag , except that it's not paisley it's flowery and strip-ey! It's the same pattern, bag with pleated sides. I think this pattern is quite hard rather than my slouchy bag or Hold-everything bag. I used a more stiff interfacing for the outer side making the bag more stable. 

-Have three pockets. 
-Size : 17"x13"x11.5"
-Price: RM37 nett 


The straps. Made bigger and with batting inside so much more comfy.


Pockets.


Interested, email me or comment me! ( nursyaza@hotmail.com)

Wednesday, March 28, 2012

Slouchy Bag - For Ms Ain


HEYYEAAAY! Thaanks to my first buyer, Ain Syahira :) She ordered a slouchy bag. Green corduroy  matched with sweet lovely pink flowers cotton. Finished with a green army button. 


Thank you, please come again :)

Monday, March 26, 2012

Red Paisley Tote Bag

SOLD! :) 


The Red Paisley is up for sale! :) 

The bag were made using three type of different fabrics; two different paisley cotton for center and red-cotton-ish-pants-material for the sides and straps. Hooo this bag is really for paisley lovers xD Anyways, the sides were pleated to give the bag more shape. This bag is really big! You can "sumbat" your books, your pencil case, headphones, net book and so on. Also it was fully covered by interfacing! 

-Size is 17"x13"x11.5"
-Have two pockets
-Fully handmade
-Price ; RM35 nett.


Straps :) 
Pockets :D 

Interested, EMAIL ME :) Thank you!

Friday, March 23, 2012

Make the easiest tunic


My first try, I sew a top for myself and wear it! Although the finishing is not really neat and not meticulously done for the neck and sleeves but at least it looks okay....from far xD 

Here's how. First of all find a tops/tunic you want to trace it with as in use it as a pattern. I used one of the tops which is sleeveless because I don't want to sew anything with sleeve.....yet! And then put your tops on the fabric just like in the picture, make sure the fabric are fold in two to make the front and bag pieces. 


Oh and since I'm using chiffon-like-material and if you want to use it too, make sure to pin everything up before you cut because it can be very slippery hahah.


Then, outline your tops for seam line, just outline half inch or 1/4" (just like in picture). I want the tops to be a bit bigger so I left a bigger seam and do use chalk for outline-ing purpose! XD 


To cutting session! Cut on the line you have drawn. BUT! For the front part trace the front part of your tops and cut it just like your front sample top. And then, jahit tepi! Since this is chiffon-like material so you have to neaten the edges to prevent the thread from being *woosh woosh* around. You get what I mean?


After cutting and all, sew along the edges and for the neck and sleeve I just fold them a bit into the wrong side and sew on it. Sorry no pictures! For the bottom of the top, you can either let it loose or fold a bit into the wrong side just like the neck and sleeve.




Thursday, March 1, 2012

Tiered-Skirt

 Hey hey march!

Actually this tiered-skirt was my first project I guess that lead me to the sling bag and all. Ok I don't remember. However, I made this skirt last year and was inspired from this lady who posted the tutorial on burdastyle I think? But I forgot her link, sorry! xD So yeah here it is another sew-work of mine.


Edited; OKAY WAIT I FOUND THE LINK XD
The tutorial on how to do this skirt! Maxi Skirt Tutorial. And and and yeah was using almost the same color as her's. Whatchuuu thinnnnnnk?