Showing posts with label tutorial. Show all posts

Friday, March 23, 2012

Make the easiest tunic


My first try, I sew a top for myself and wear it! Although the finishing is not really neat and not meticulously done for the neck and sleeves but at least it looks okay....from far xD 

Here's how. First of all find a tops/tunic you want to trace it with as in use it as a pattern. I used one of the tops which is sleeveless because I don't want to sew anything with sleeve.....yet! And then put your tops on the fabric just like in the picture, make sure the fabric are fold in two to make the front and bag pieces. 


Oh and since I'm using chiffon-like-material and if you want to use it too, make sure to pin everything up before you cut because it can be very slippery hahah.


Then, outline your tops for seam line, just outline half inch or 1/4" (just like in picture). I want the tops to be a bit bigger so I left a bigger seam and do use chalk for outline-ing purpose! XD 


To cutting session! Cut on the line you have drawn. BUT! For the front part trace the front part of your tops and cut it just like your front sample top. And then, jahit tepi! Since this is chiffon-like material so you have to neaten the edges to prevent the thread from being *woosh woosh* around. You get what I mean?


After cutting and all, sew along the edges and for the neck and sleeve I just fold them a bit into the wrong side and sew on it. Sorry no pictures! For the bottom of the top, you can either let it loose or fold a bit into the wrong side just like the neck and sleeve.


Thursday, March 1, 2012

Tiered-Skirt

 Hey hey march!

Actually this tiered-skirt was my first project I guess that lead me to the sling bag and all. Ok I don't remember. However, I made this skirt last year and was inspired from this lady who posted the tutorial on burdastyle I think? But I forgot her link, sorry! xD So yeah here it is another sew-work of mine.


Edited; OKAY WAIT I FOUND THE LINK XD
The tutorial on how to do this skirt! Maxi Skirt Tutorial. And and and yeah was using almost the same color as her's. Whatchuuu thinnnnnnk?


Saturday, February 4, 2012

The Easiest Headband Ever!


So while waiting for my mood to kick in to do some bags, i made this headband it's so cute right? And it's so easy that you can make 100 a day! And once you do it, you wanna do some more and more and more! Believe me.

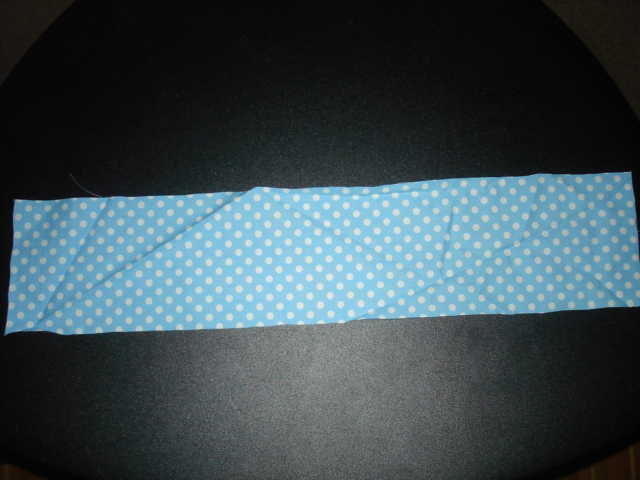
I will teach you how to do this super easy headband! First of all, you need a fabric. Some leftovers from your blouse or 'baju kurung' would be fine. So cut the fabrics about 18" x 4" like below! Oh btw you also need a 5" elastic band! I;ll show later.


And then fold the fabrics into half all the way down the center (wrong sides together)


Theeeen fold like in the picture below about 1/2" i guess all the way down and then do it for both sides left and right just like in the pictures below! Then iron ittt! 


Done it? No, not yet! You need to fold your corners like the picture below so it will be neat at the end of the project! 


Okay after you fold fold fold, then sewing time! Sew sides together, put one end of elastic into the opening of one side. Sew closed using a zig-zag stitch. Switch back to straight stitch and stitch down one side. Insert the other end of the elastic into the other opening. Sew closed with zig-zag stitch.  Switch back to straight stitch and sew up the second side. Now it's done and you can wear it :> 


The end-project! Oh but you can always modify, this is just the basic of the basic headband and I got this tutorial from here Easy headband tutorial! (thankyou) and I think I skipped some of the instruction heh heh heh.

Simple enough :)

Sunday, January 22, 2012

Slouchy Bag


My second project! I took a long time to get on my sewing machine and sew another bag. Sigh. Anyway, this is my favourite bag now since it's green! And i feel so lady-ish wearing it. Ha-ha. I used a green curderoy fabrics for the outer bag and the lining was from the leftover cotton from my sister's baju kurung and THEY FIT PERFECTLY!  It took me two days to finish this bag, two days.


(The picture belowThis is how the bag should look, there should be some flap for the closure! But i didn't have the snaps tool :( So, I will sew it once I have the snaps or maybe when I have some pretty buttons. Look's better with the flap, right?


Here's a take-a-peek inside photos. I really like the cotton xD Don't you? And there's a pocket! There should be two pockets but I don't want to hassle myself and since this is my first bag with pocket so I just made one :D hihi. But but I was so excited that my pocket is sooooo pretttyyy! 


Okay that's all! Maybe I could sew this and sell it, no? Tell me whatchu think! And thankyou showtellshare for the pattern and tutorial! Here's a link so you can sew too, Show Tell Share : Slouchy bag :) 

Lunch Bag


This was actually my mom's project, she was sooo eager to make this strawberry cute lunch bag! I feel so picnic-ish looking at the picture. So I'm gonna share more pictures of ze bag. I just can't help but to put the bottle beside the bag because I think they make a good pair, no? 


The strap was taken from my dad's leather pouch which he doesn't need it anymore and it matches perfectly with the bag! My mom used only 2 fabrics (the strawberry-like and i-think-it's-linen-ish black fabric) for this bag and a very light fusible interfacing. So what do you think?

And thankyou pink penguin for the tutorial! And for those who wanna try to make this lunch bag here's the link! Pink Penguin's Lunch bag tutorial :)

Friday, January 13, 2012

How to : Alter Baggy Jeans

I have this one old jeans which is kinda baggy and long. I don't want to throw it away since it's really comfortable actually. So after doing a little search on how-to alter, I found out it's quite easy! And the best part is I get to save my money! So here's a picture of my jeans before I alter it:


So this is how I alter it. Lay it down and by using a blue sewing chalk, i outlined the inner seam. The line indicates how fit I want it to be and this is the line where I will sew on it.


I'm making this jeans into a bootcut style so I alter between the thigh and stop a few inch above my ankle. (If you want to make it skinny, sew until the very bottom of the legs! haha) I don't have any proper picture to show you what i meant, but just Youtube! 


So anyway, this is the after product. Better off, no? So this jeans is not gone to waste aha!


Don't afraid to try as it's hard to go wrong. Plus the Youtube videos are very helpful and I bet in 10 mins, you should figure out how to do it right. But! In my case, I didn't cut anything, I just sew on it without cutting the jeans.